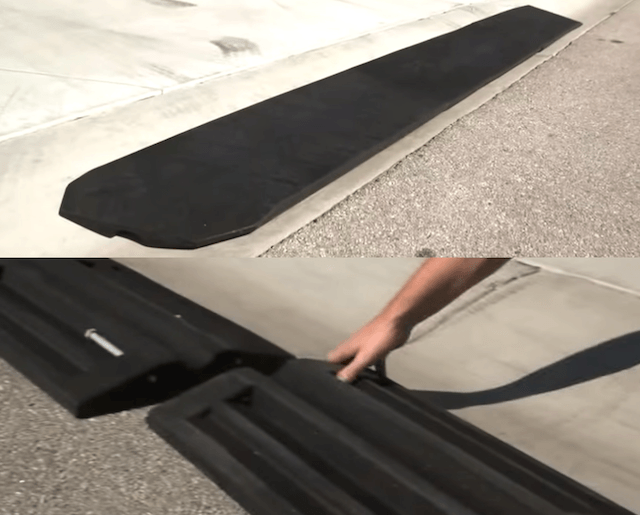
How To Bolt BRIDJIT Ramp Sections Together
The initial three piece set which provides 12 feet of driveway coverage, can be expanded to any width using additional four feet center sections for wider driveway entries.

BRIDJIT curb ramps are a sturdy and reliable product. Like all automotive accessories, BRIDJIT curb ramp installation works best when the supplied instructions are followed. (We offer some more installation tips in this article.)
The installation process requires bolting the ramp sections together with the supplied hardware, not to the concrete. Connecting the ramp sections together creates a mass of 153 pounds or more that assist in keeping the ramps firmly in place.
If you’re wondering how to properly bolt the sections together, you came to the right place. If you follow the guide outlined below, you’ll have a much easier time tackling this task.
The Tools You Will Need
The good news is you don’t need any special tools to tackle this project. Below is a list of all the tools you need before joining your BRIDJIT ramp sections together. It’s very likely that you already have these basic tools.
- Hammer
- Broom & dustpan
- Long flat blade screwdriver
- A 2×4” block of wood or a type of block that’s at least 4 inches high
Bolting The Ramp Sections Together

Every set of BRIDJIT curb ramps come with ½” x 7.5” galvanized bolts, pre-inserted in the center sections. Follow the instructions that come with your BRIDJIT curb ramp, and you’ll reach a point where you have to hammer in the galvanized bolts and then install the nut. Fortunately, we have tricks to tell you about.
First, sweep up the area where you’re going to place the curb ramp. Then set up all of the sections there, upside down. Take the following steps:
- Standing on the ramp section receiving the bolt, hammer the galvanized bolts into the adjoining section. Hammer the bolt head to within 1/4 of the rubber.
- With a friend, lift each section up by the joint and slide a 2×4” block of wood (or another type of block that’s at least 4 inches high) underneath the joint so that it holds up the joint by at least 4 inches. This flexes the ramp, giving you more room to screw on the nuts with your fingers only.
- Place the long flat blade screwdriver underneath the threaded end of the bolt and carefully prying towards the middle of the ramp, raise the bolt up away from the rubber and screw a nut on each bolt so that ¼ inch of the bolt comes through the nut. Lower the bolt back down to the rubber and repeat as needed. The rubber will grasp the nut and helps hold the ramps tight to each other. Leaving some room between the nut and the retaining area rubber allows you to adjust the ramp around curved curbs if necessary.
- Once all of the sections are joined together, have a friend help you flip the curb ramp over into the gutter area starting at one end of the ramp. If right to left repositioning is required, straddle the ramps at the center, lift up the ramps and lean back the way you need the ramps to move.
Please contact us if you have any questions or need guidance. We’re always happy to help you join the sections together in the easiest, most efficient way. And, for more even more BRIDJIT Curb Ramp tips, check out this article about curb ramp maintenance.


